Luxe for Less: Garden Party Decor: Chair Garland & Tissue Tassels DIY
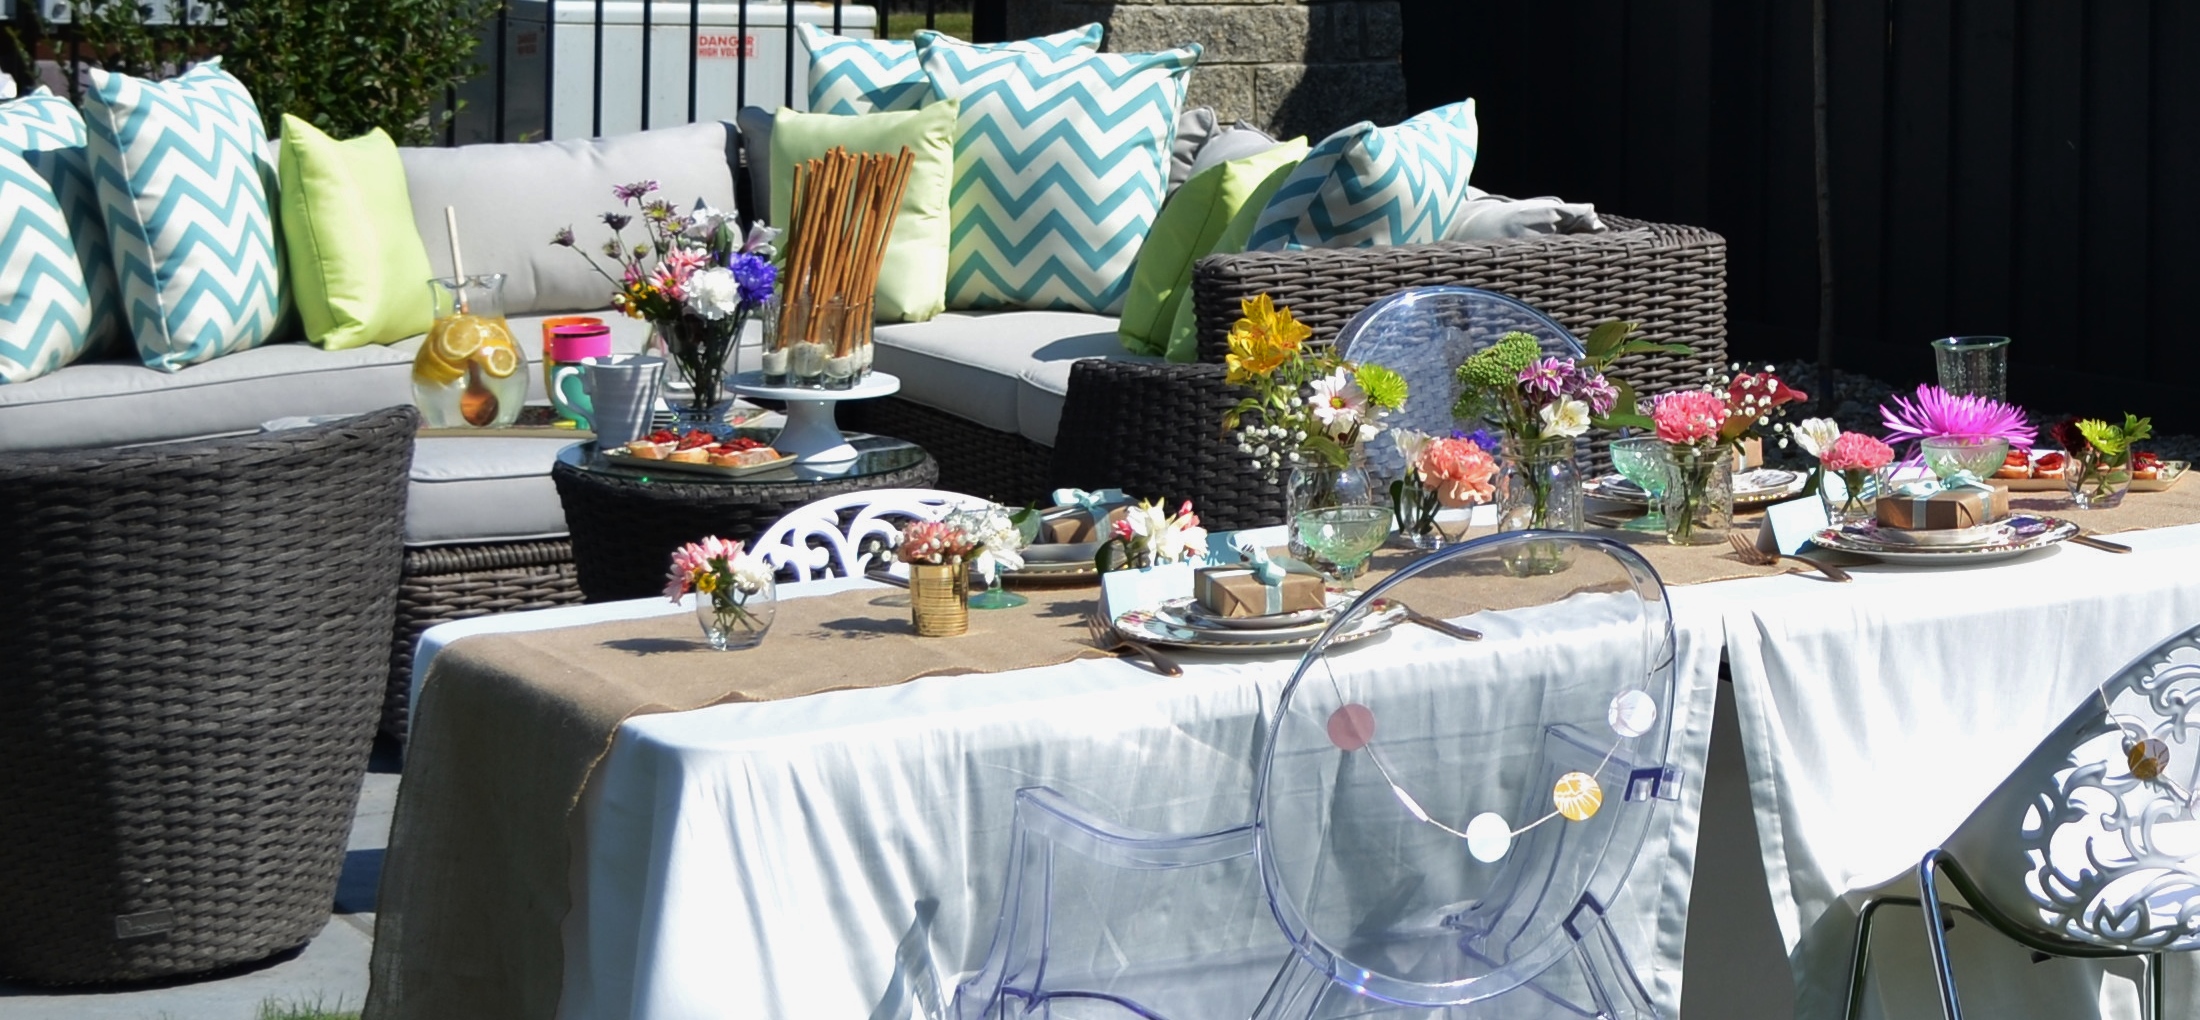

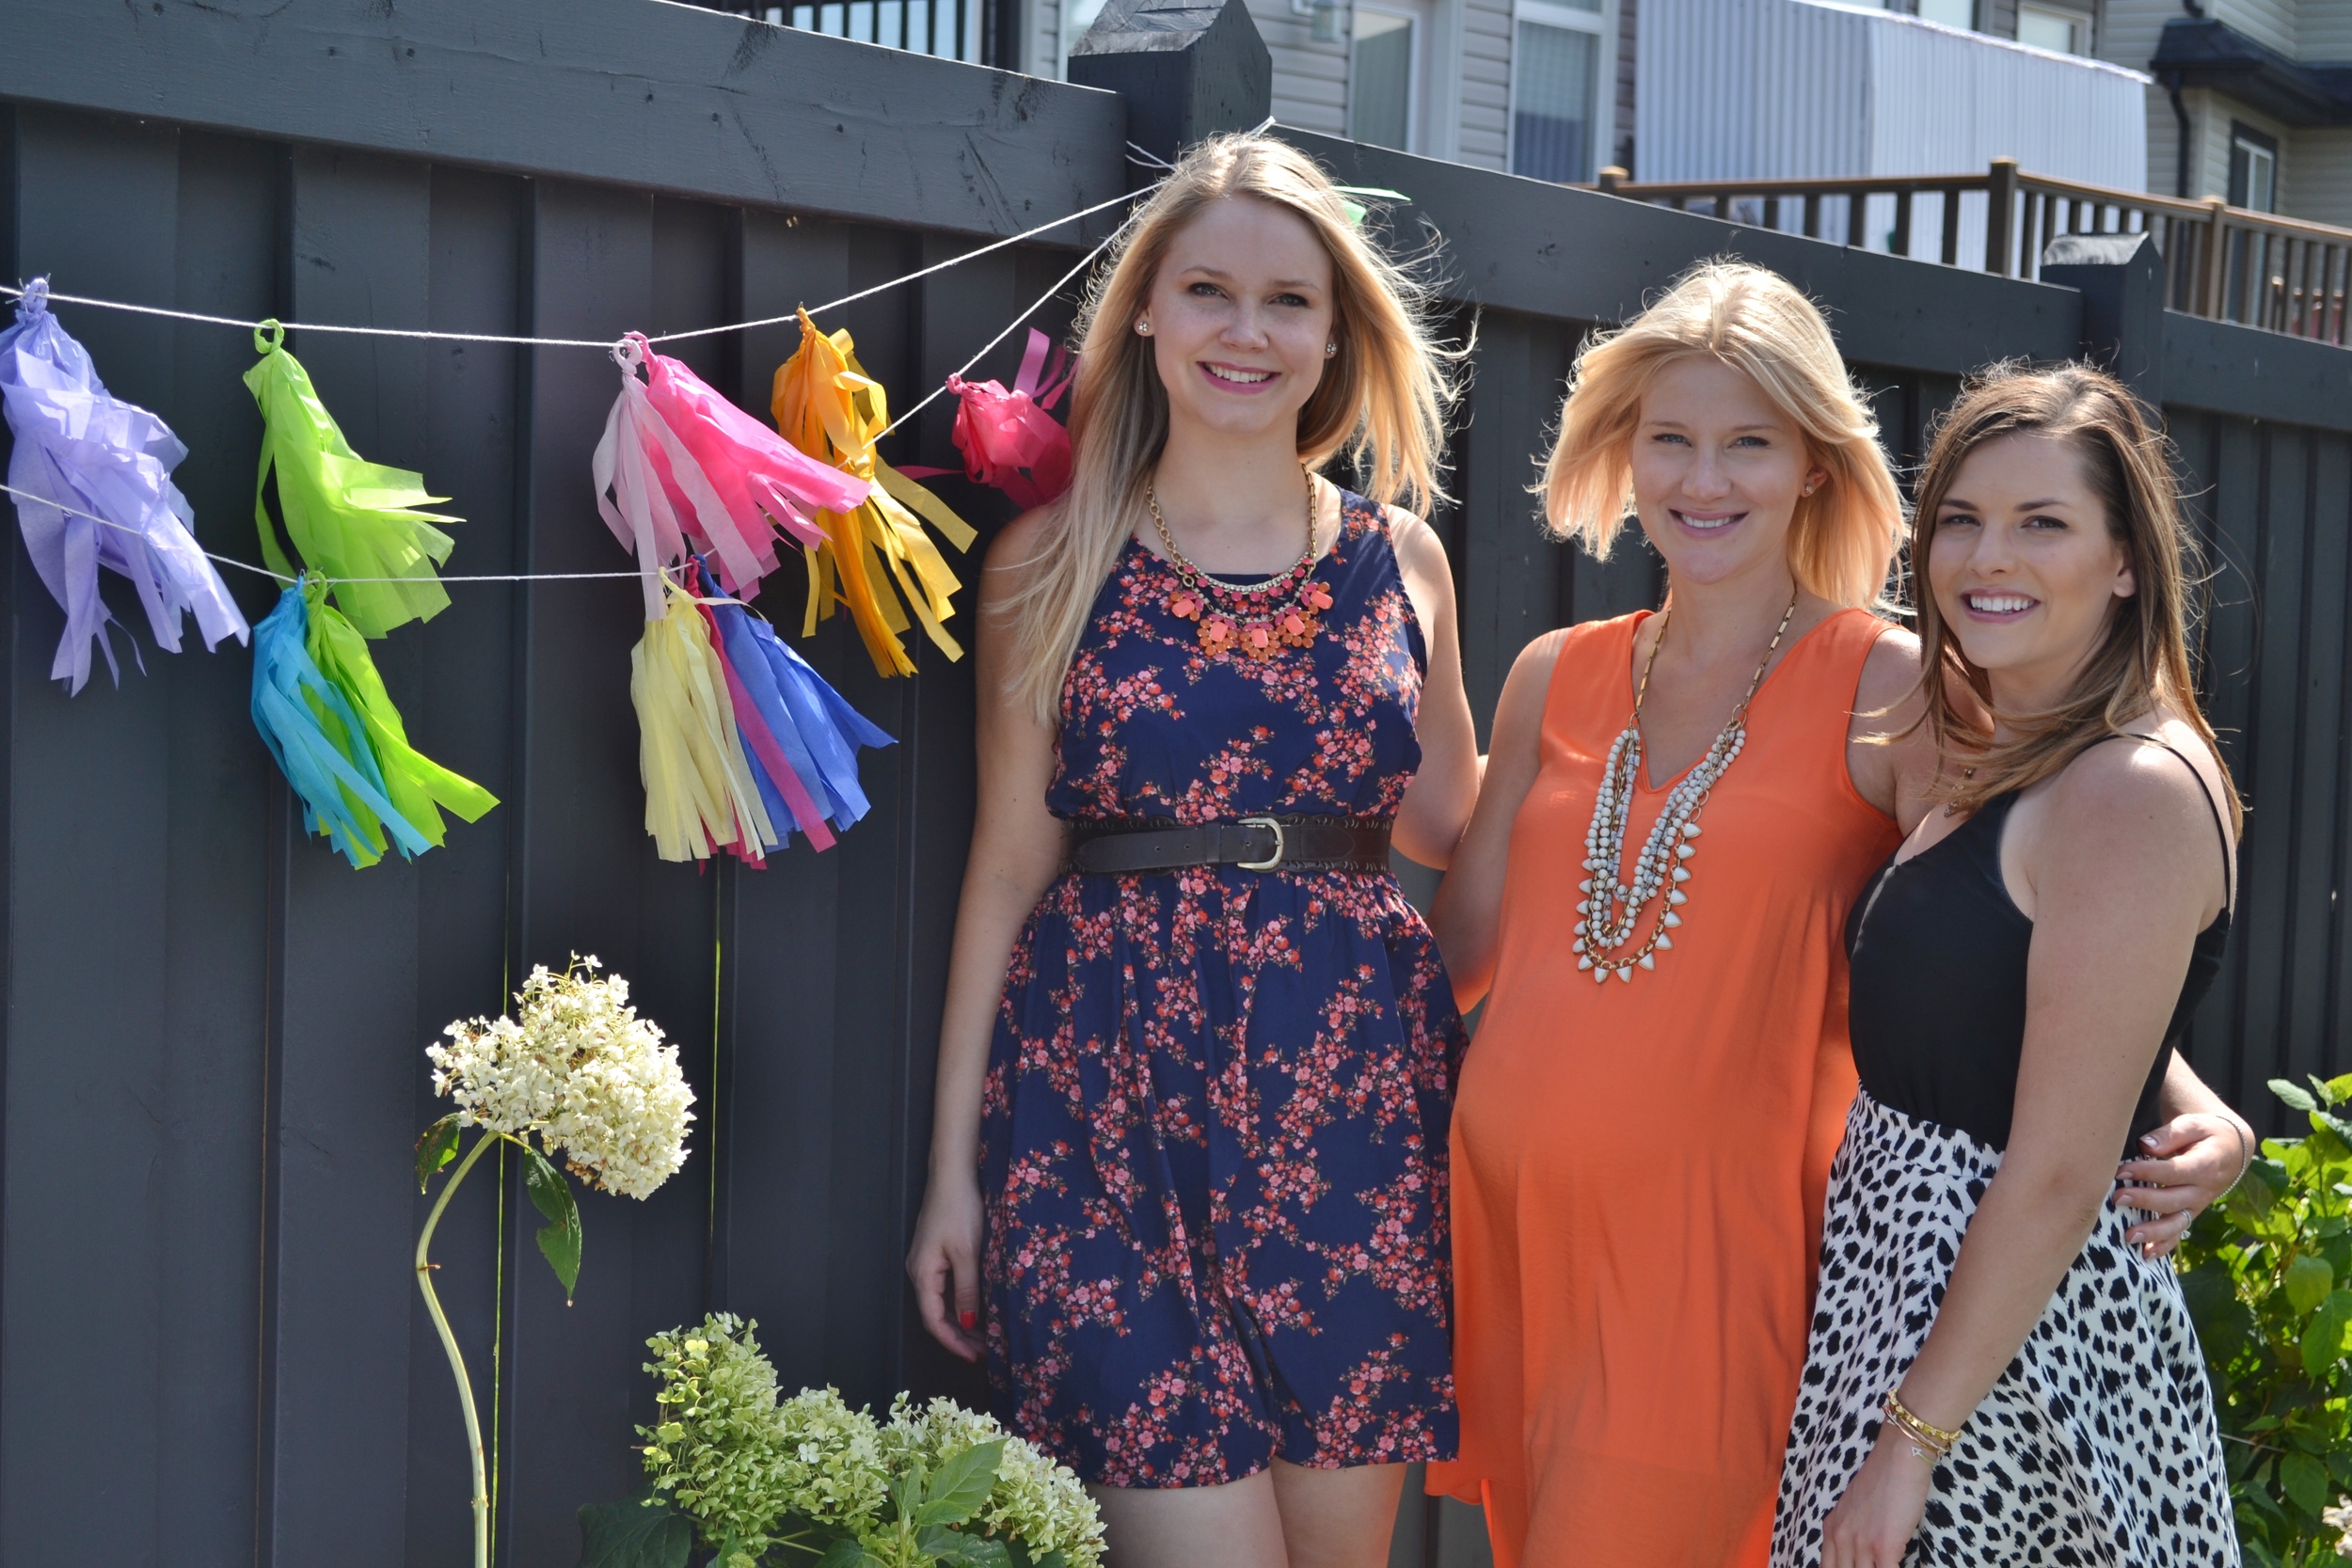
Happy thursday loves! As I'm sure you've been (hopefully!) seeing over the past weeks, us ladies threw a bright, floral and fun garden party a few weeks ago. We had good food (hellooooo strawberry balsamic crostinis and watermelon feta cubes!), bubbly drinks, lots of flowers & an eclectic table setting in addition to a few DIY's for the event.
When you're throwing a party it's always best to have fun decor, but purchasing decorations can get costly. If you're DIY savvy, spending a bit of time making your own decor can not only be good for your wallet, but it's lots of fun too.
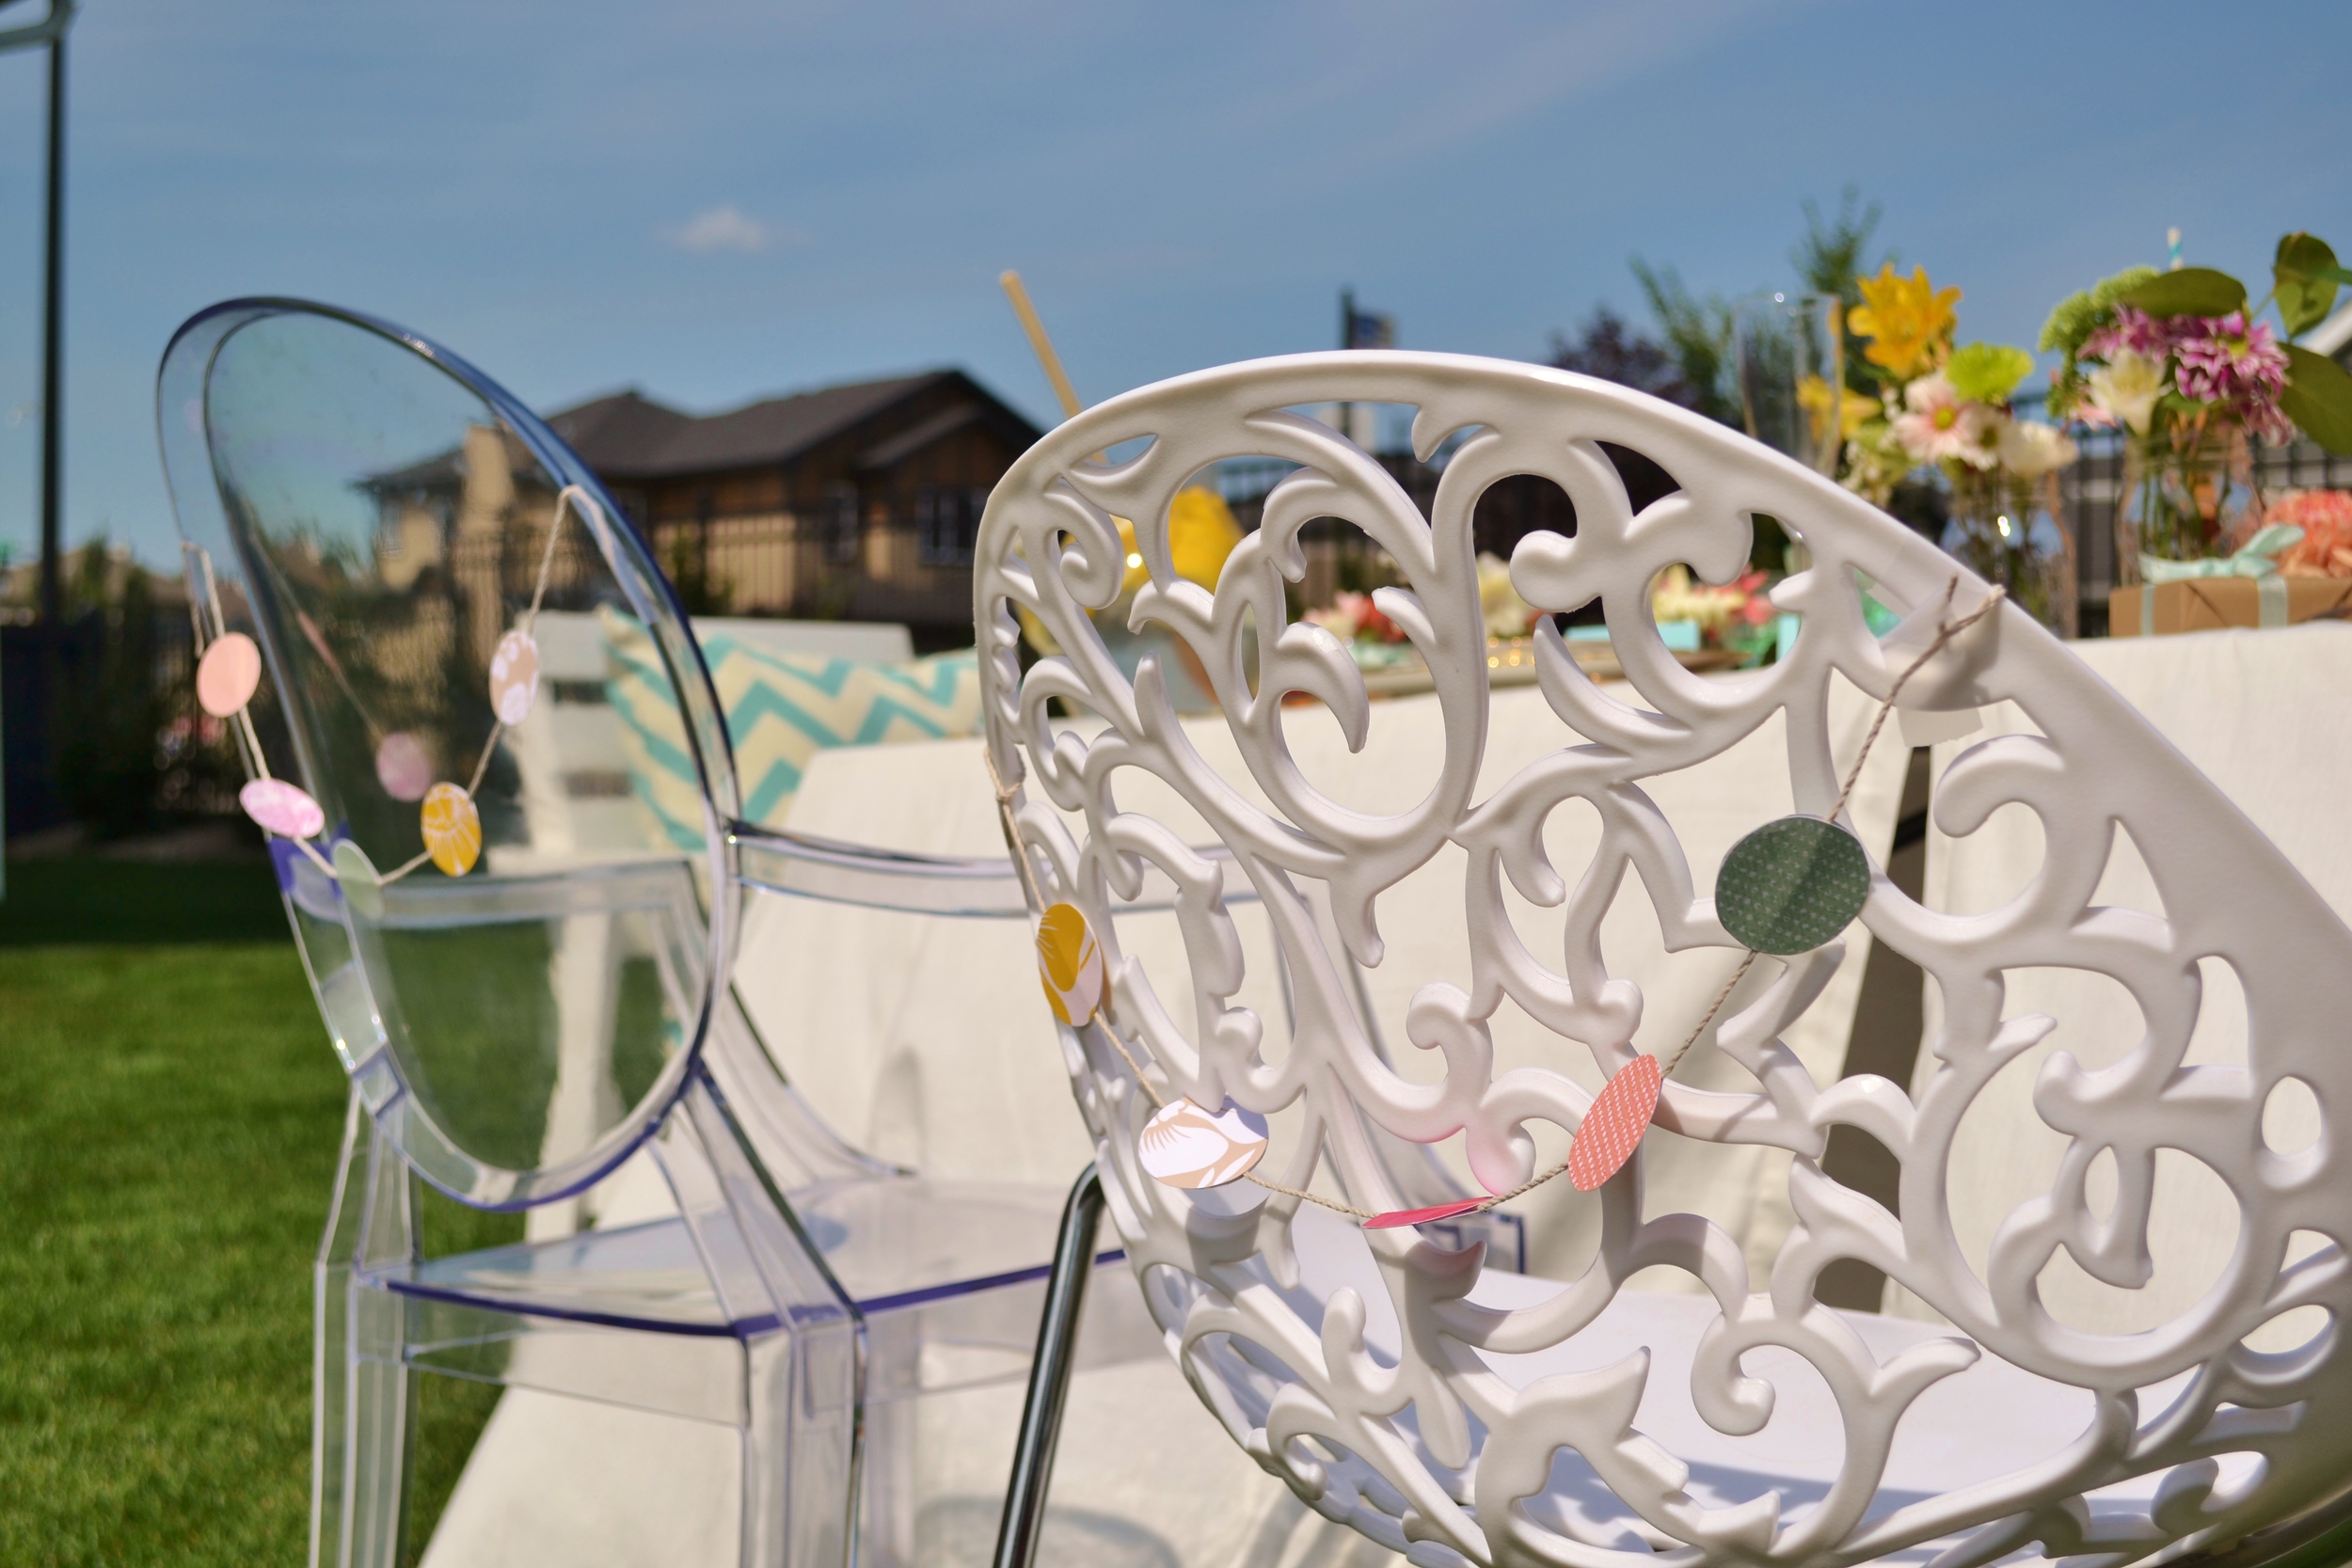
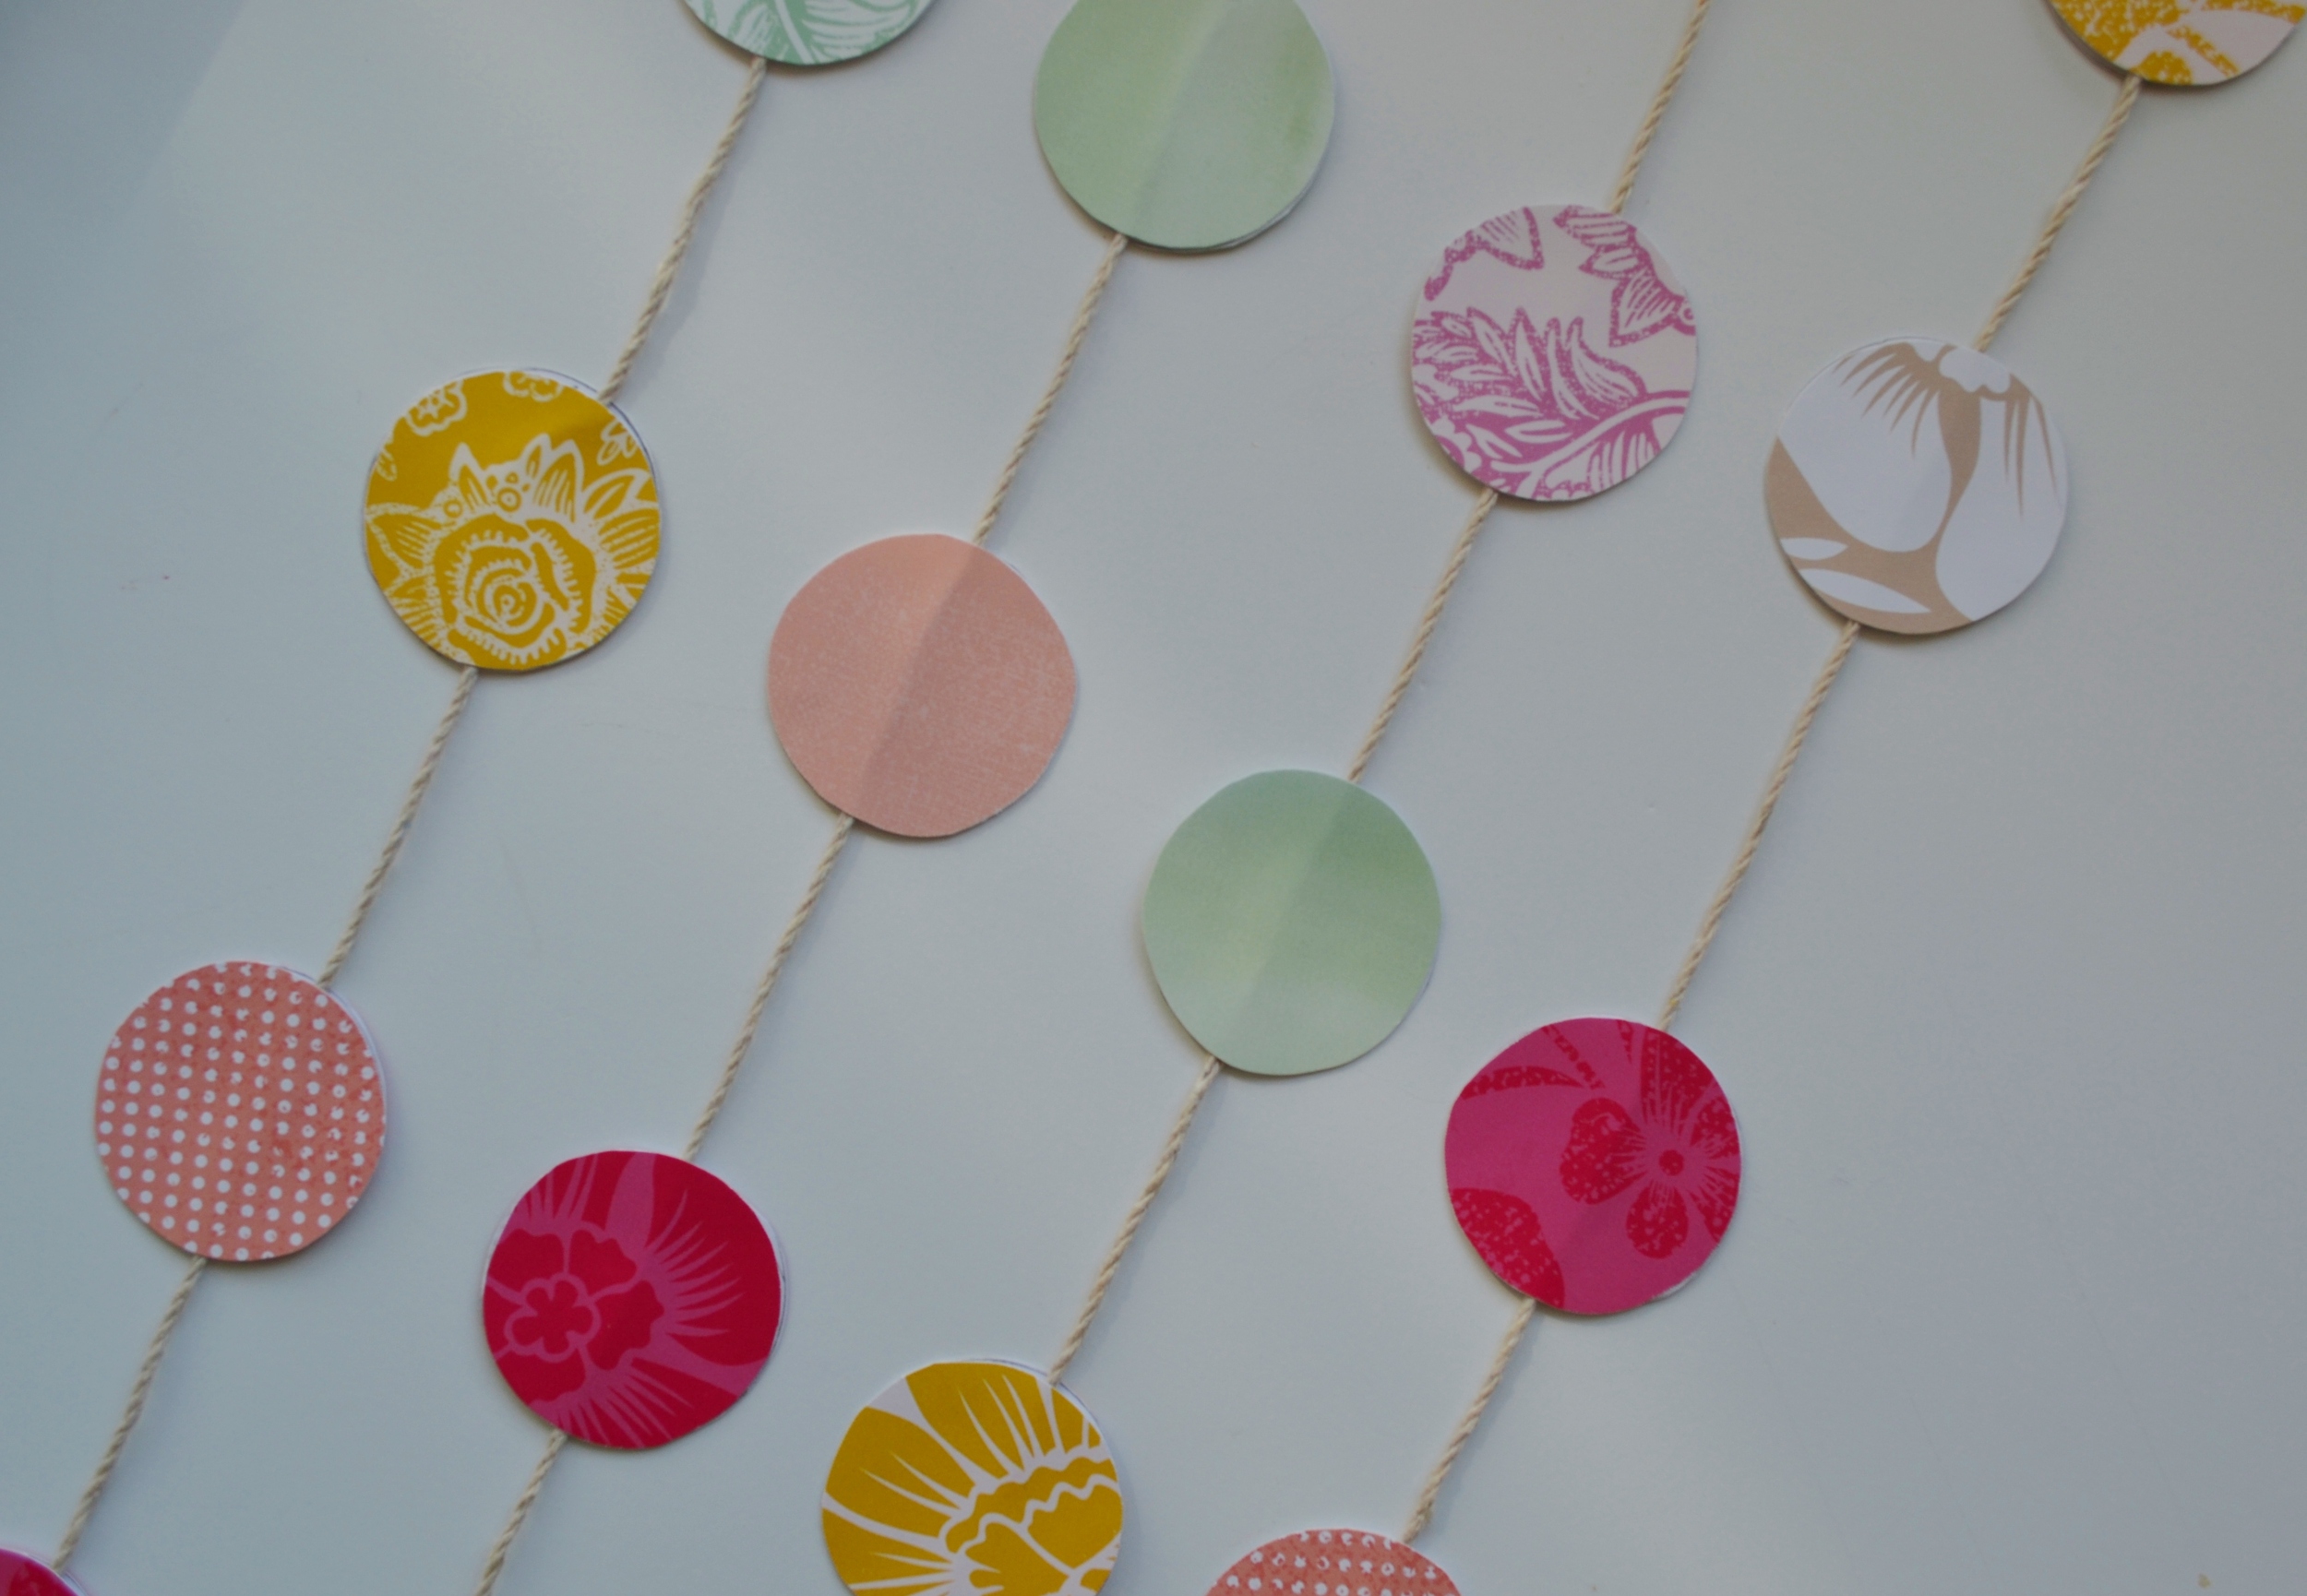
Our first DIY was a chair garland made from these too cute confetti pieces from minted that we were sent for the party. I love the versatility of this garland as it could be used so may ways, and can completely be customized for your event (think showers, birthdays, christmas..the list goes on!) but for this day, we thought adding a bit of a bright and floral pop to our mix & match chairs would be a fun way to inject pattern to our vibrant table setting.
So, love this idea as much as we do and want to make these for yourself? Here's how!
What you'll need: Paper of Choice // String // Glue Gun (or adhesive of choice) // Scissors

Start by determining the length of string you'll need based upon your chair. Then cut your strings and set them to the side

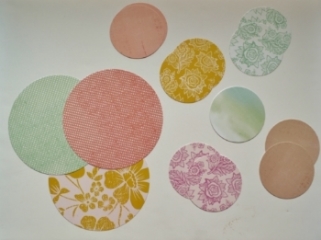
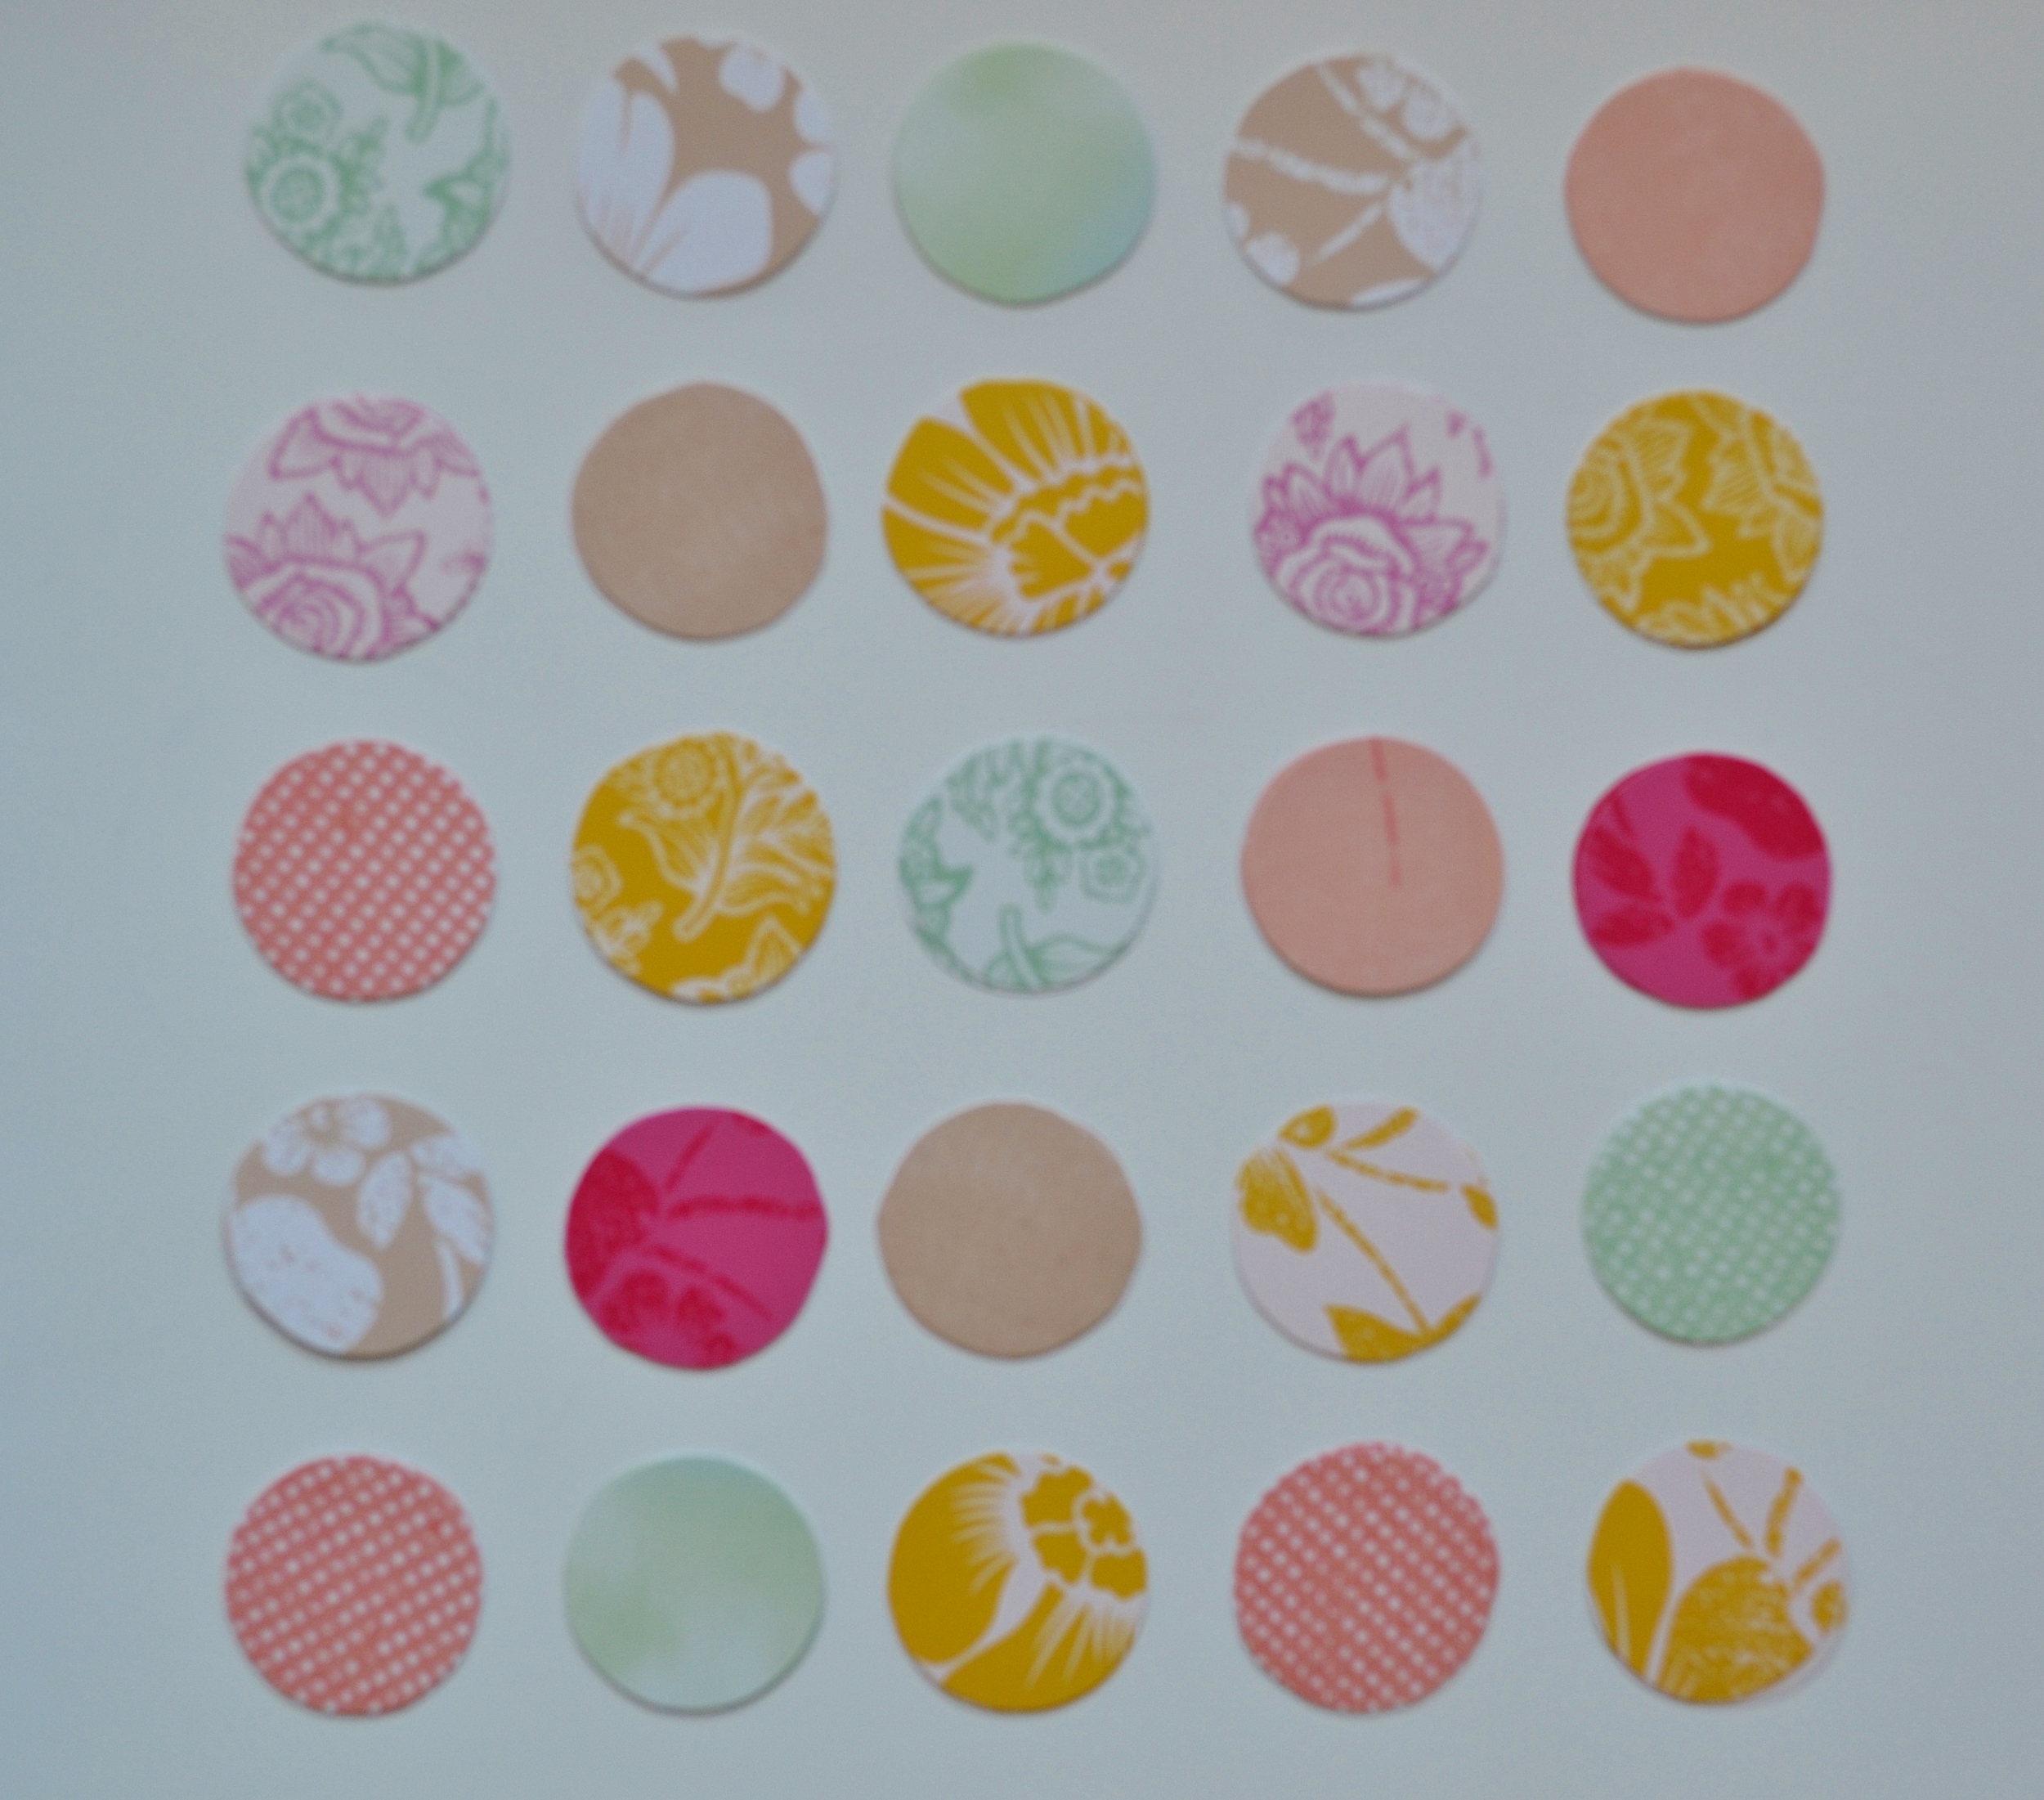
Using your paper of choice (think: scrapbook paper, construction paper- these are table confetti papers from Minted), determine the size of circle you'll want based upon the length of string required and the scale of your chair. This floral pattern is perfect for summer but you can choose any paper colour or pattern depending on your party theme!
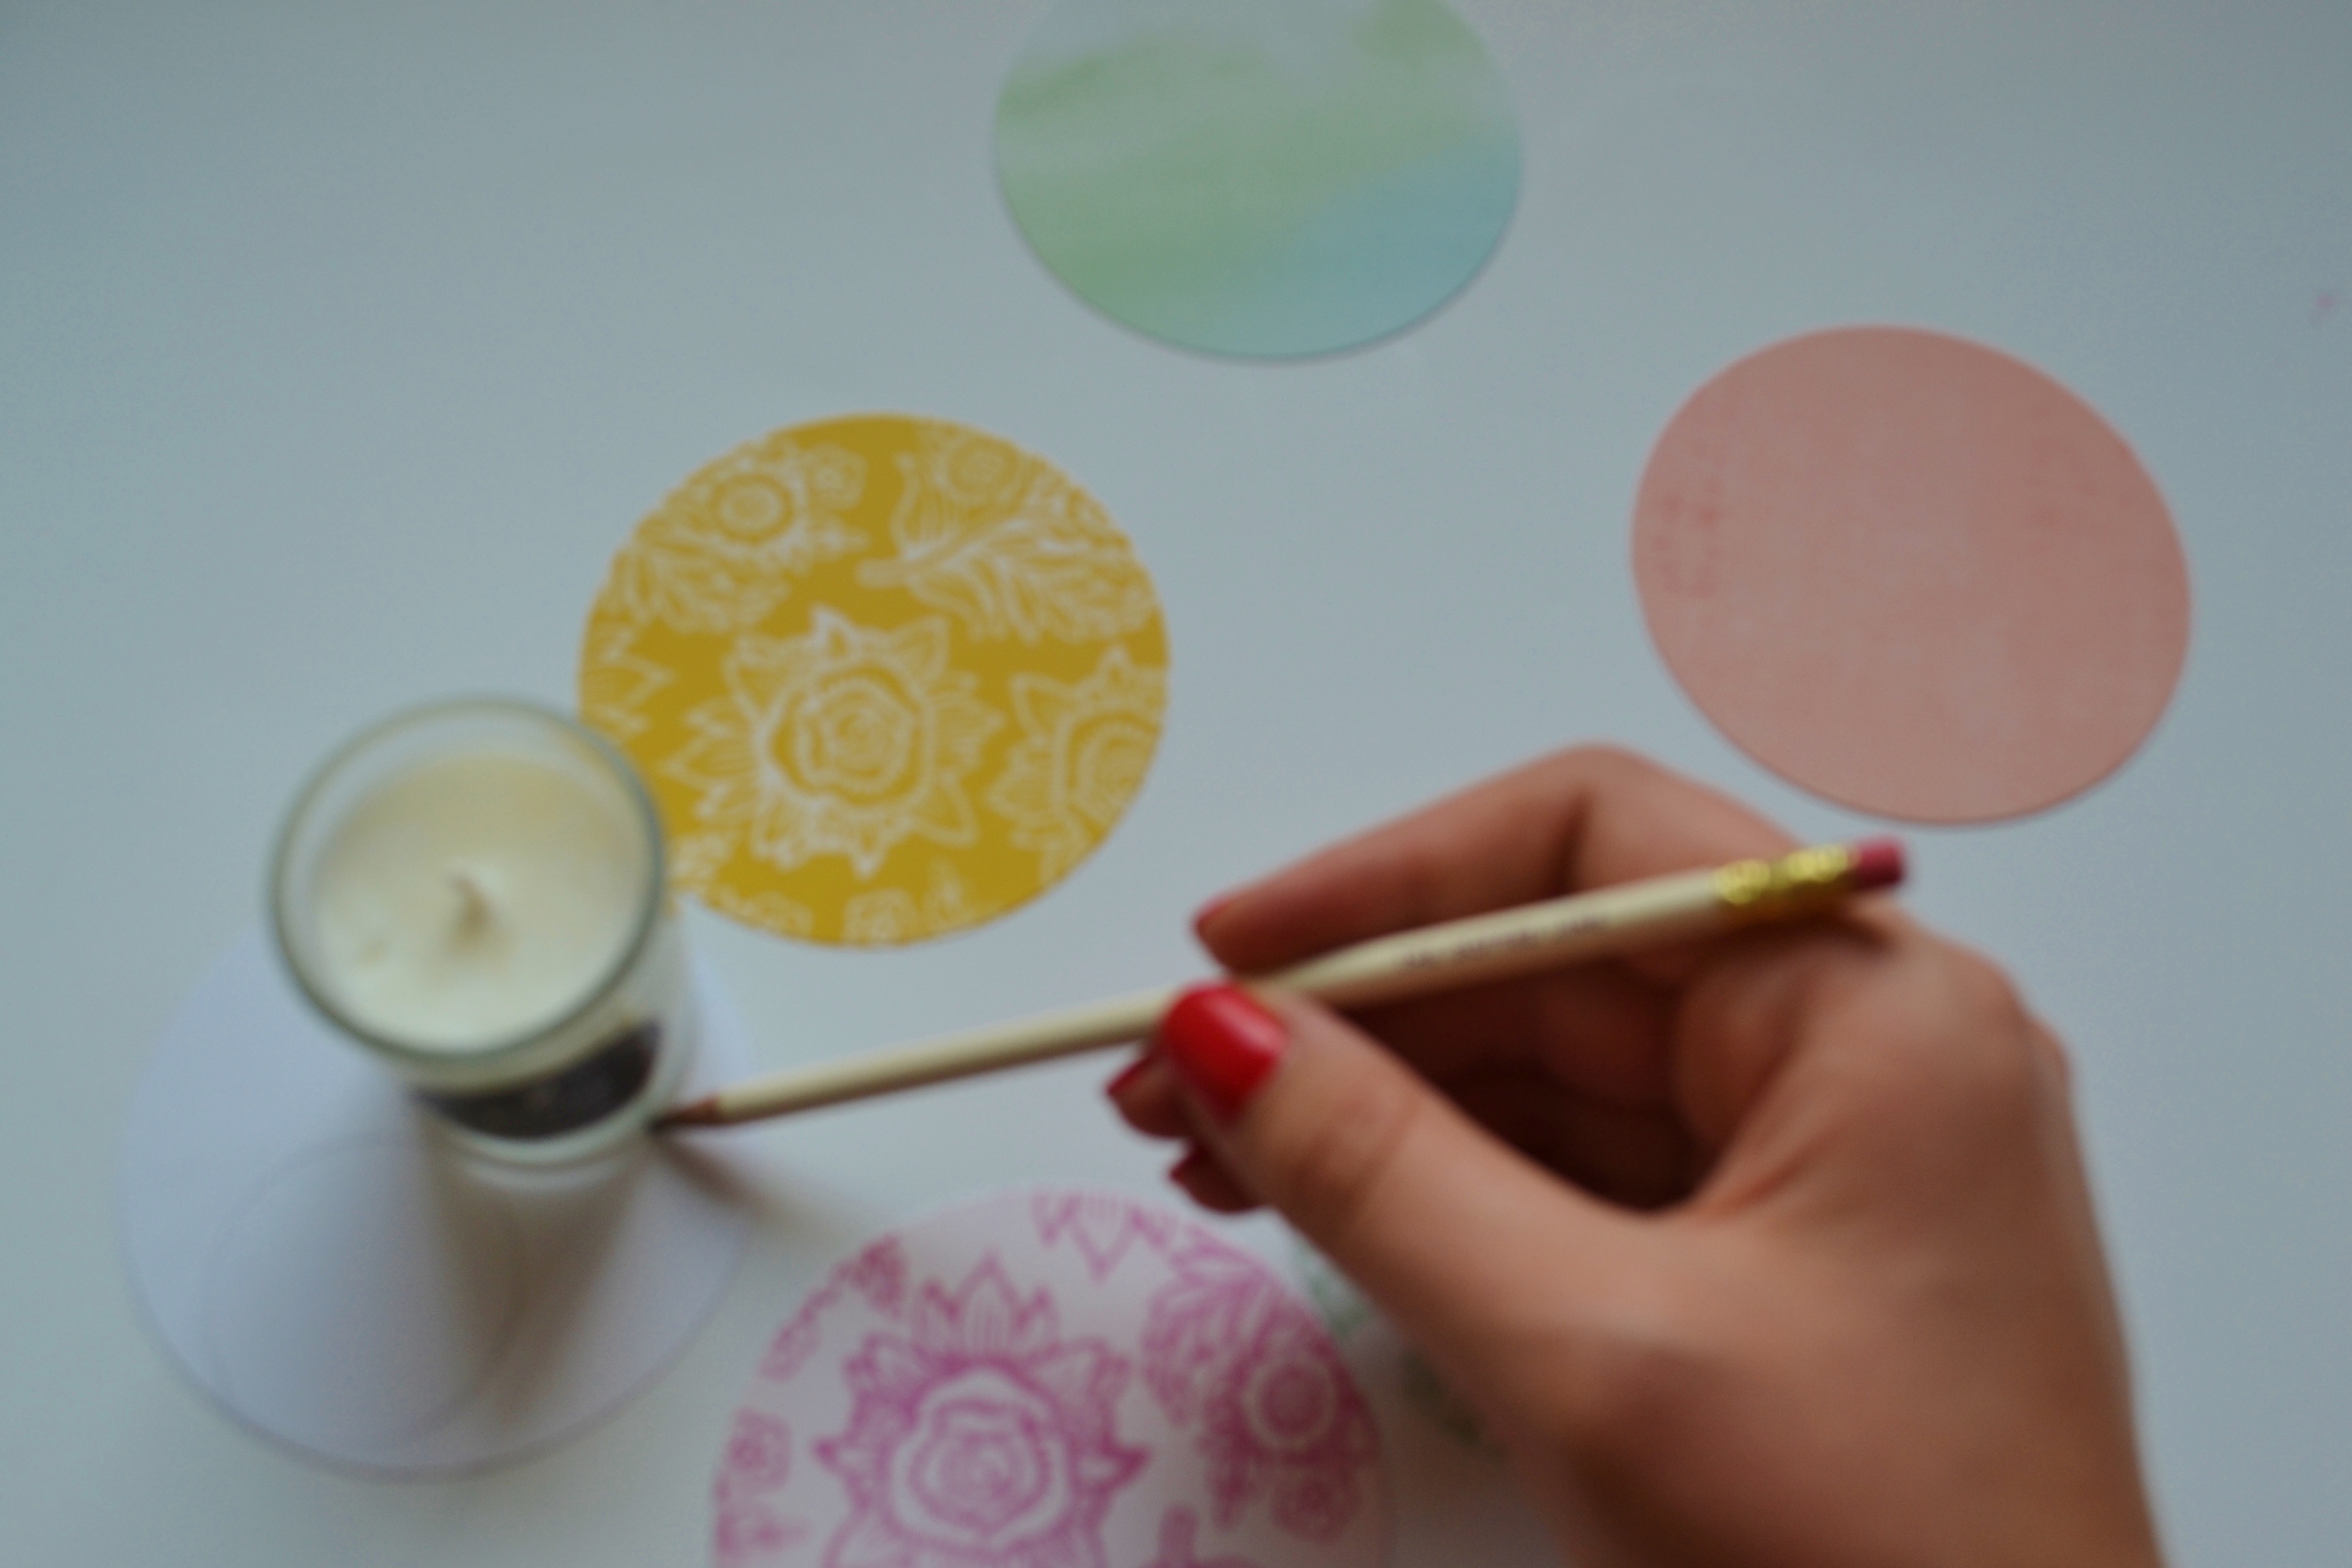
Find an object to use as a template (this little votive I had worked perfectly) and begin to trace as many circles as you need per string. As a rough idea, my circles were 1.5" and I used 5 per string that was approx. 24" long.
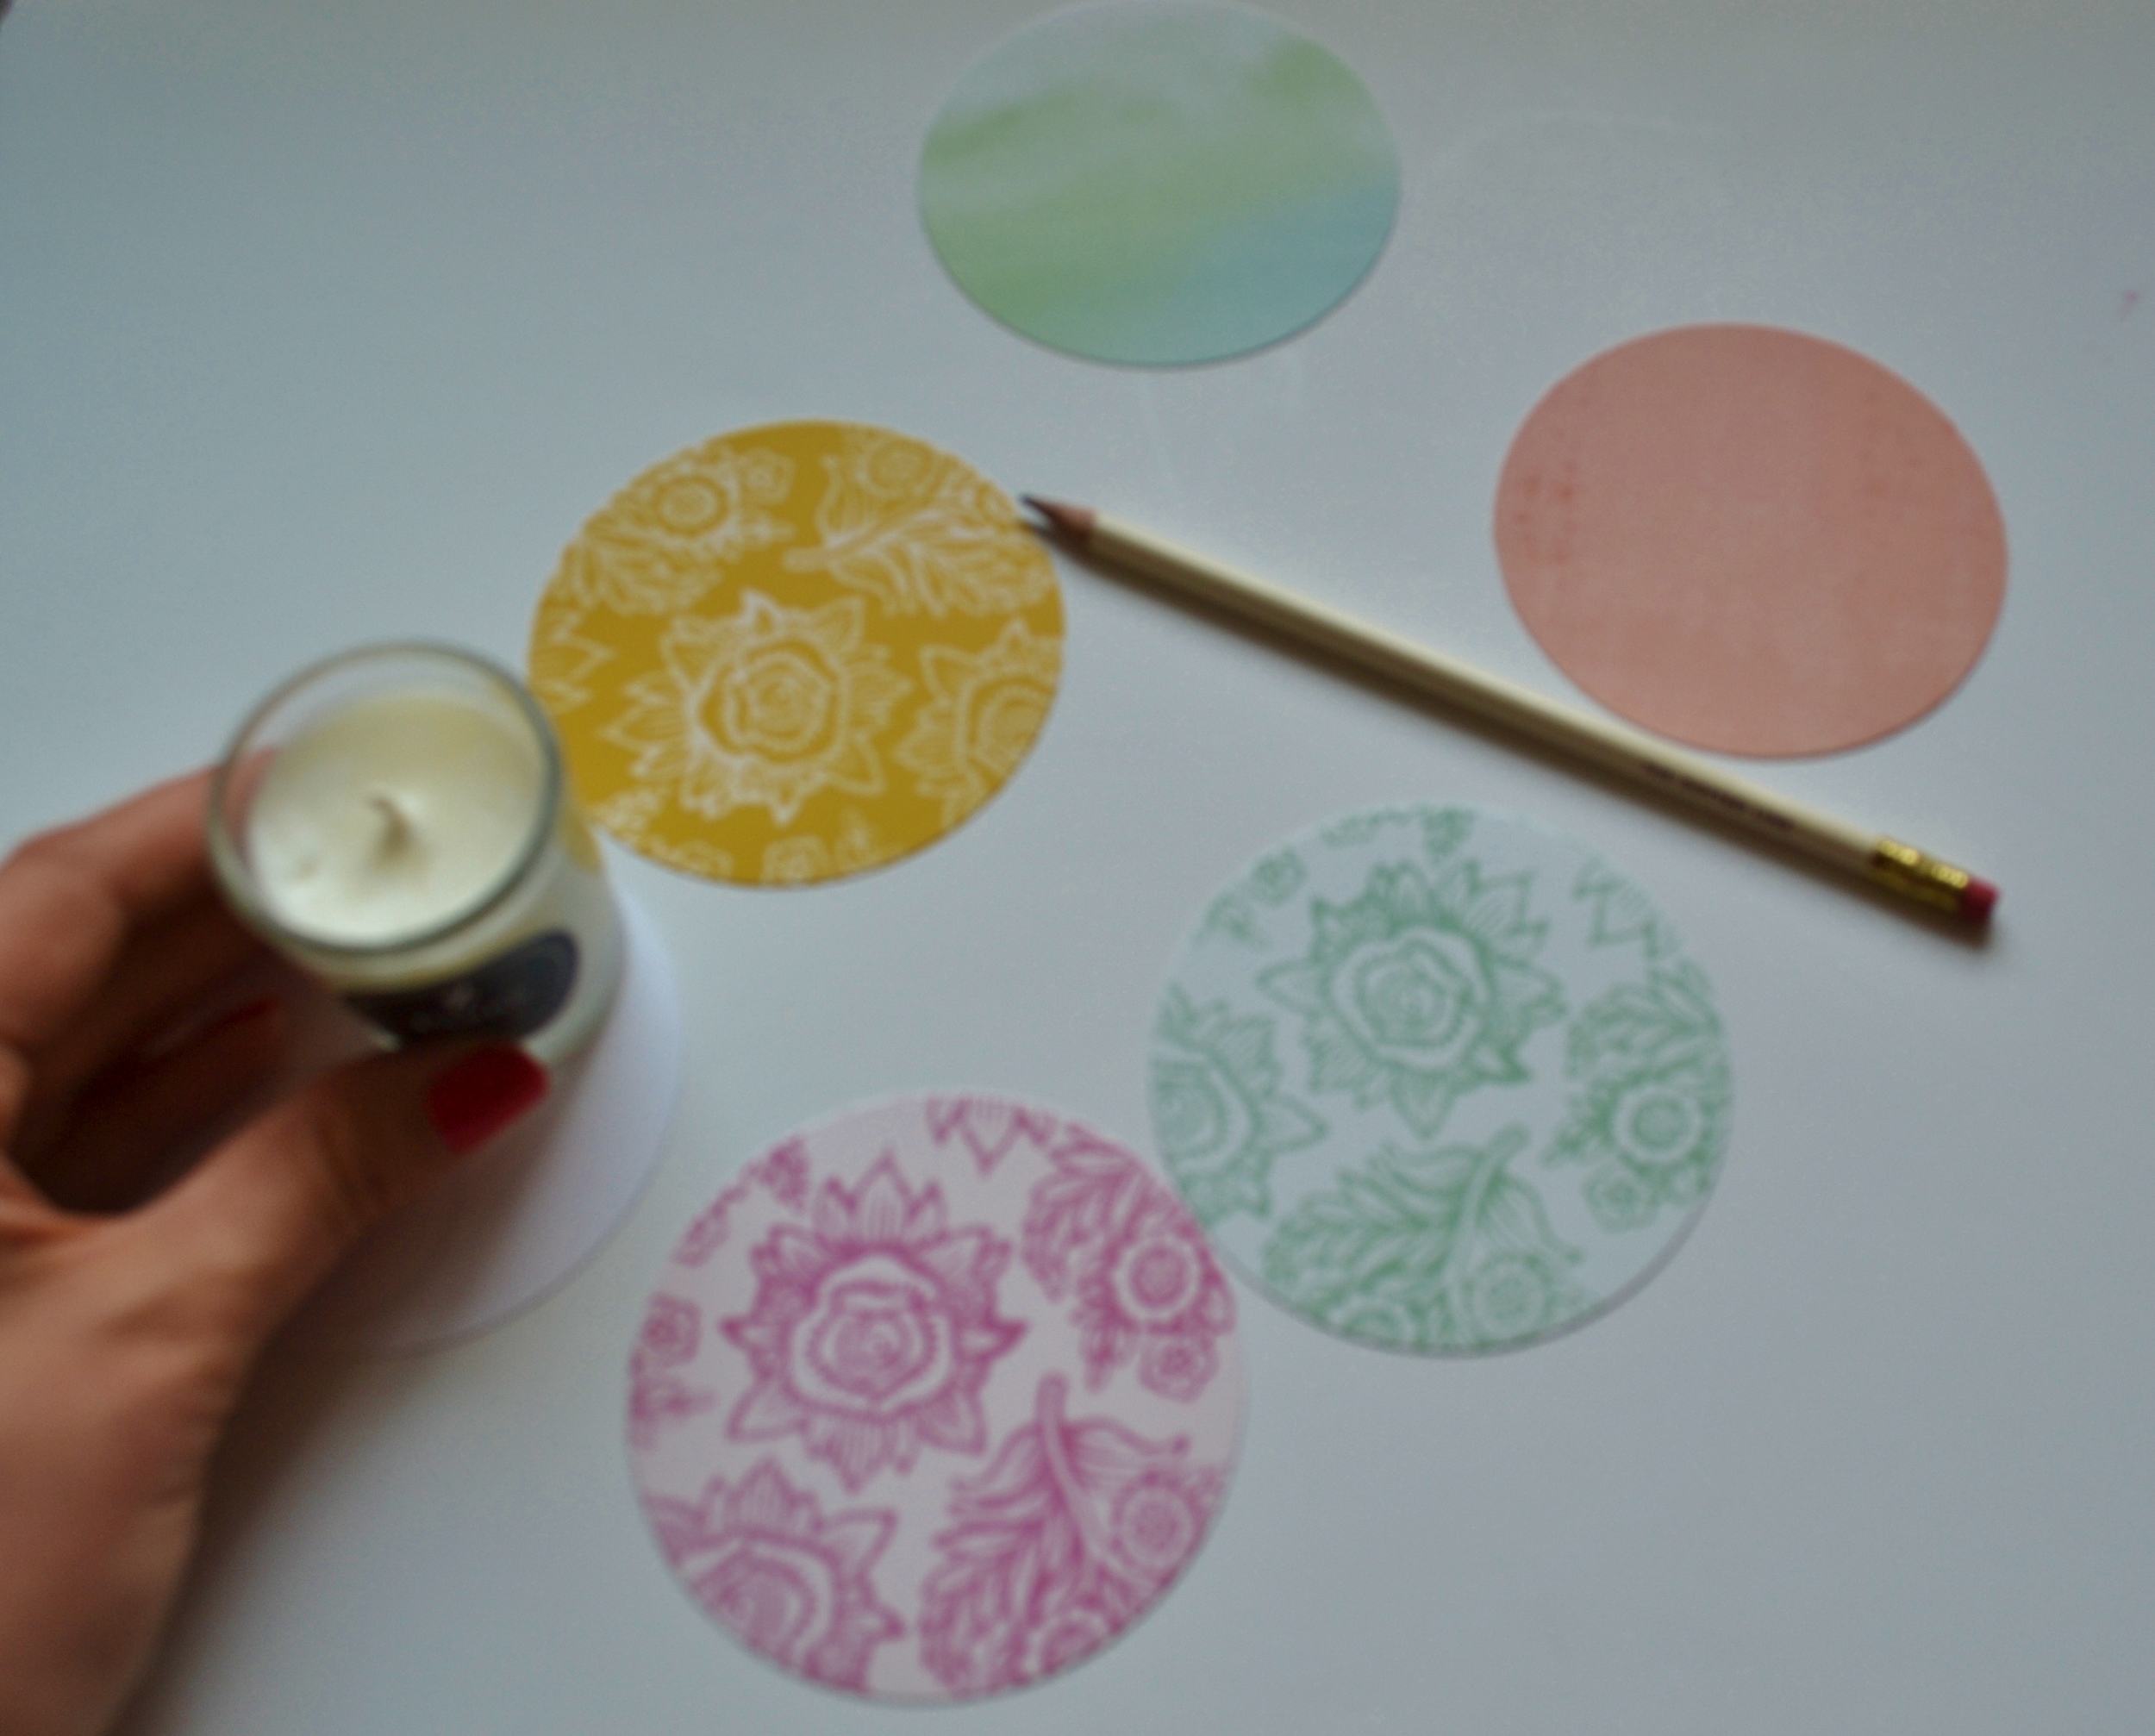
Keep in mind while cutting your circles that you place one circle on either side of the string so for each piece on the garland, you require two of the circle templates
Then begin by placing the bottom circles under the string and apply glue to the top circle and hold down for 5 secods to set the glue
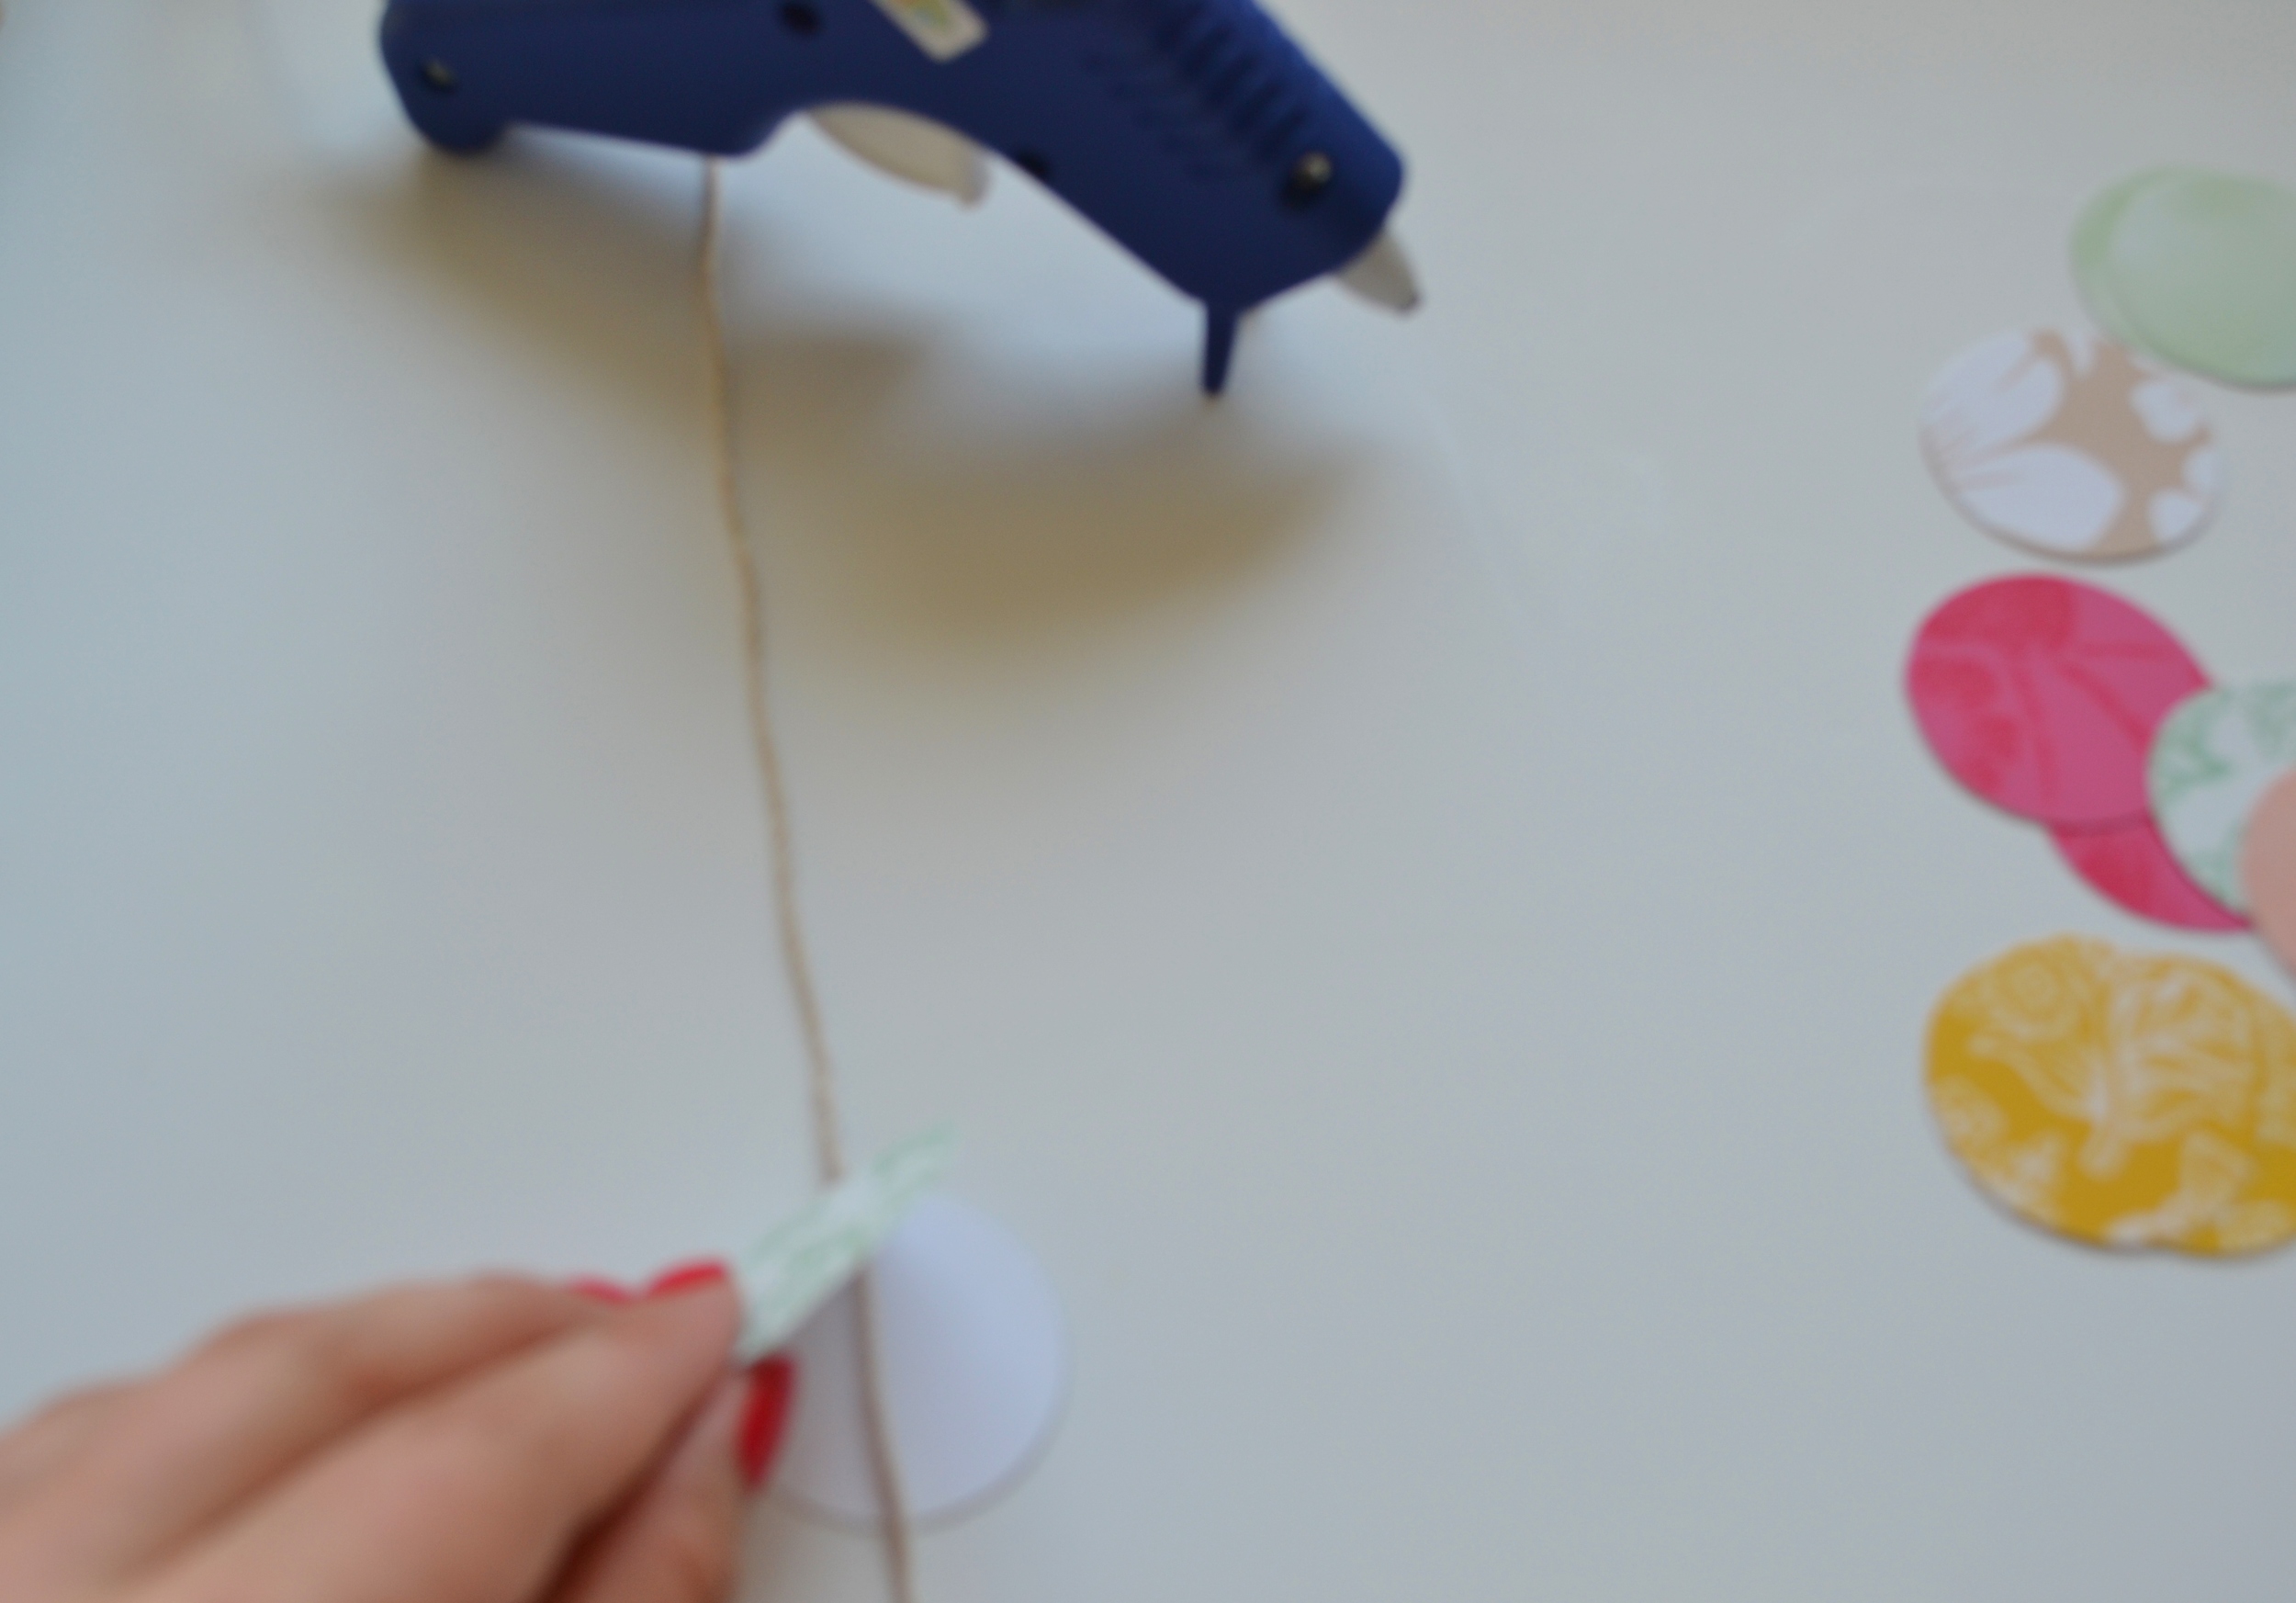
Repeat as necessary until you're done and then you have your chair garland!
You can also use these as decorative garland to hang from tables, doors, ceilings, walls, you name it - the possibilities are endless!


Our next DIY was one that you might remember from November when we decorated Coup for their holiday fete or from our DIY tutorial after posting the tassels I made for Sarah's modern moroccan showhome. When Occassions Mag Online reached out to us asking us to recreate our tassel DIY, I thought it would be the perfect opportunity to try making the tassels a different way.
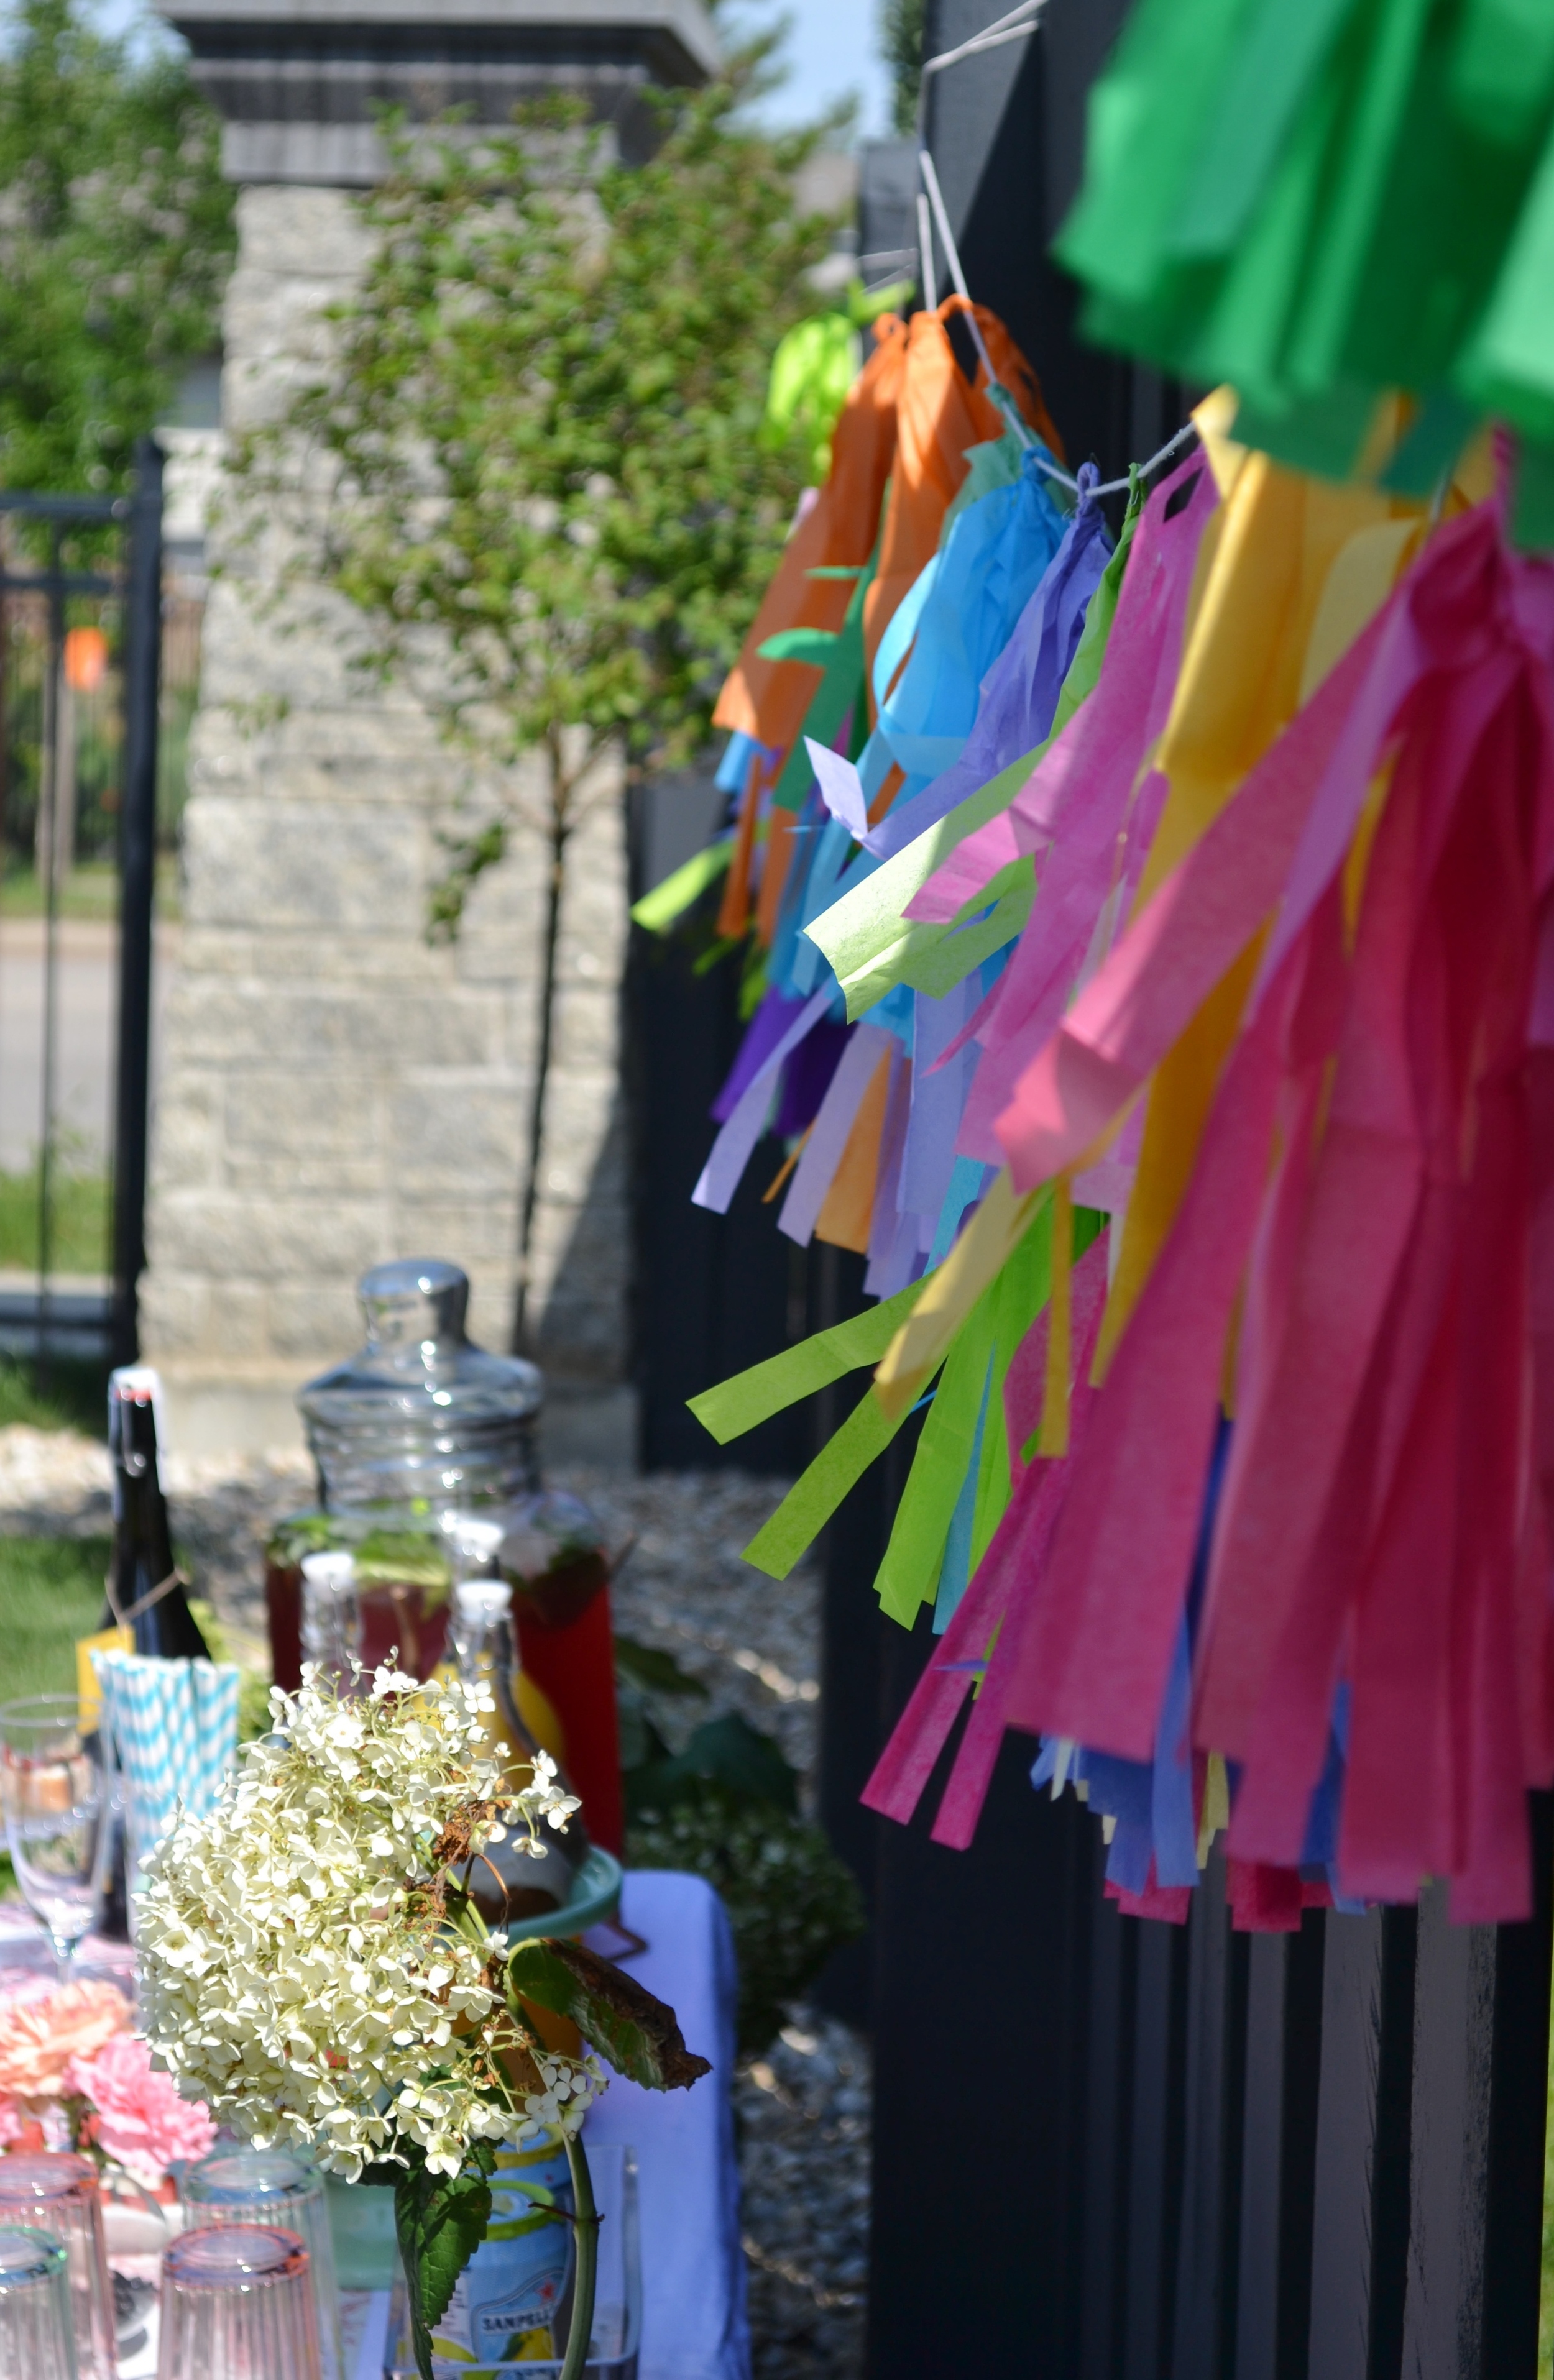
Check out our tutorial here on Occasions Mag Online for the step by step on how to make this style of tissue tassel garland for your next get together!